今回は、写真共有のスクリプトのGallery3のインストール方法を紹介します。
●そもそもGalleryとはなんだ
Galleryは、PHPで動作する写真共有プログラムでオープンソースで開発されている。
複数の画像のアップロードに対応し、Ajaxを言うものによって直感的に操作できる。
動作も軽くて快適だった。
(補足)
Galleryは写真意外に動画などにも対応しているらしい。
●ダウンロード
Gallery | Your photos on your website
上記からダウンロードする。
●インストール
今回は、Debianのマシンで試してみる。
Galleryを動かすにはApacheなどが必要だ。
root@myserver:~# apt-get update
root@myserver:~# apt-get install apache2 php5 php5-mysql mysql-server unzip
これで写真共有する分には動く。
Galleryの本家サイトからGallery3をダウンロードする。
root@myserver:~# unzip ダウンロードしたファイル名
root@myserver:~# rm -r /var/www/*
root@myserver:~# mv gallery3/* /var/www
これでGallery3のインストールは完了だ
次にMySQLにGallery3のデータベースを登録する。
root@myserver:~# mysql -u root -p
Enter Password : <—パスワードを入れる。
Welcome to the MySQL monitor. Commands end with ; or \g.
Your MySQL connection id is 884
Server version: 5.1.66-0+squeeze1 (Debian)
Copyright (c) 2000, 2012, Oracle and/or its affiliates. All rights reserved.
Oracle is a registered trademark of Oracle Corporation and/or its
affiliates. Other names may be trademarks of their respective
owners.
Type ‘help;’ or ‘\h’ for help. Type ‘\c’ to clear the current input statement.
mysql> create database gallery3;
mysql> exit
root@myserver:~#
これでデータベースの登録は完了だ。
写真を保存するところをつくる。
root@myserver:~# mkdir /var/www/var
root@myserver:~# chmod 777 /var/www/var
では、早速ブラウザーからアクセスしてみよう。
Datebase Name : gallery3
User : root
Password : パスワード
Host : localhost
でContinueのボタンを押す。
僕はこの時点で動いた。
そしてThemeなどいろいろいじっていけばこうなる
↓
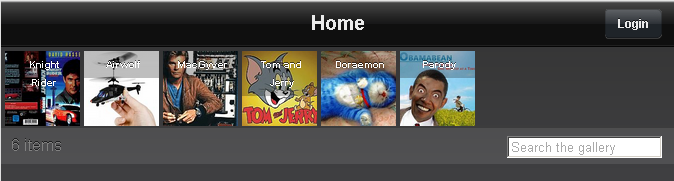
以上、Gallery3のインストール方法でした。
コメントする